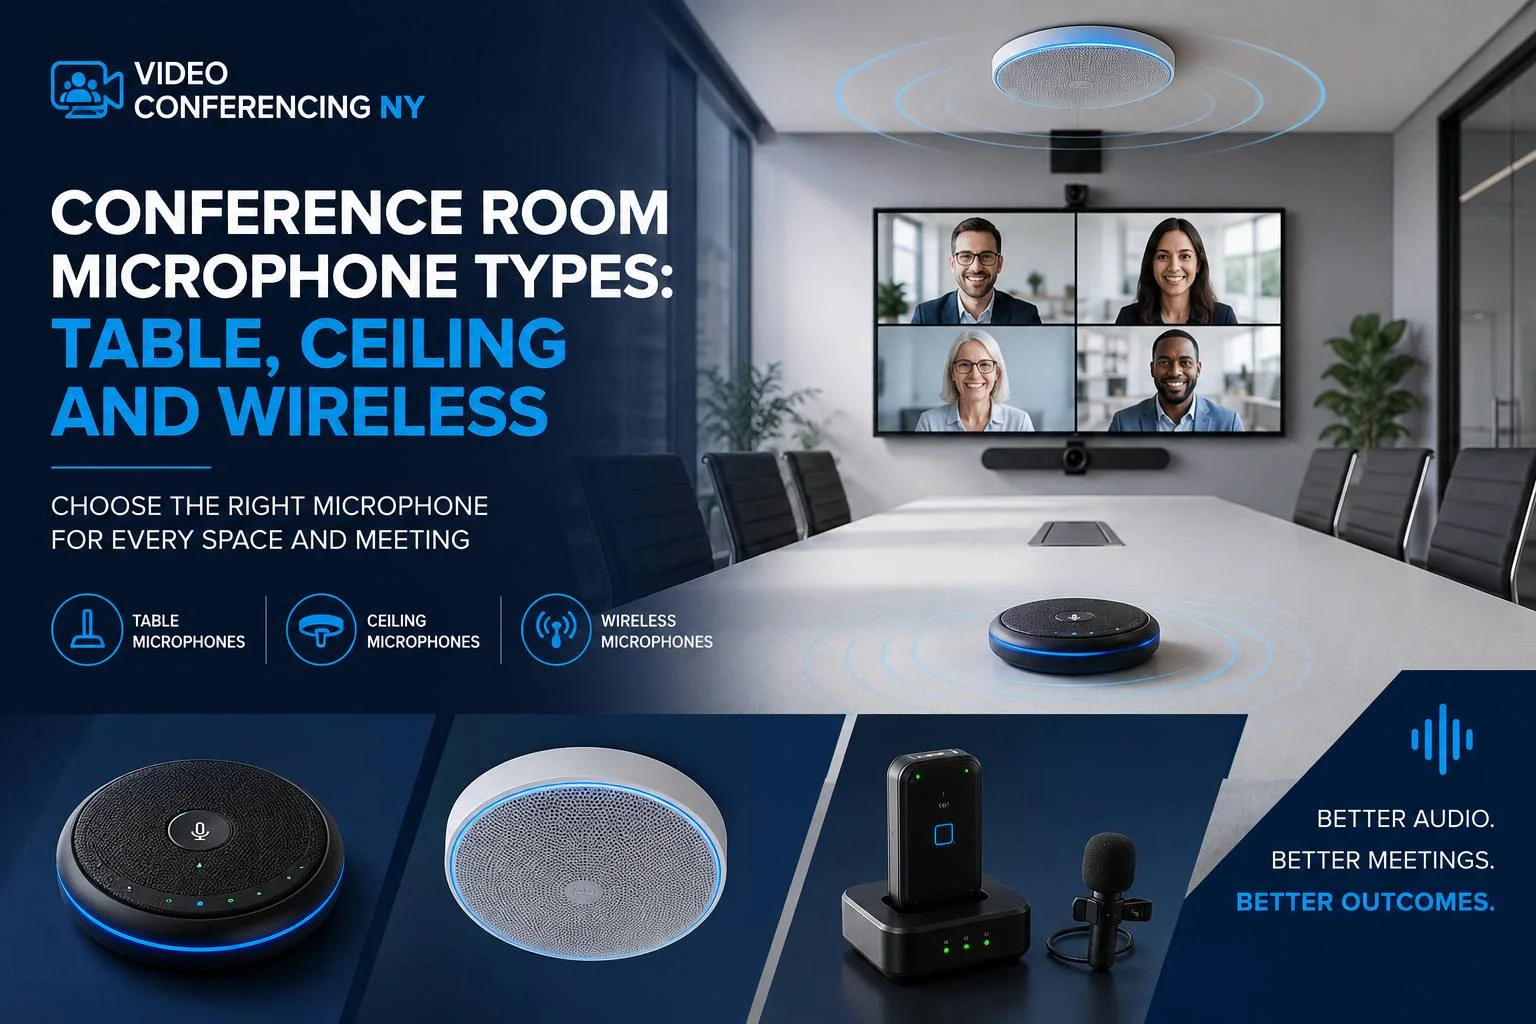
Most bad meeting audio isn’t a microphone problem. It’s a placement problem, a room problem, or a network problem wearing a microphone costume. Picking the wrong conference room microphone locks all three in for the next five to seven years, because mics get drilled into tables and cut into ceilings and nobody wants to touch them again. Here’s how the three real options behave after the installer leaves.
Key Takeaways
- Table mics deliver the most usable pickup per dollar. Ceiling arrays deliver the cleanest room and typically cost three to five times more once labour is counted.
- A single high-end ceiling array covers roughly 30 by 30 feet, with a 16 foot ceiling on talker distance. Past that, you’re buying a second unit.
- Wireless units solve flexible and landmarked rooms, but somebody has to own the charging routine or the system fails on a Monday.
- If reverberation time in the room is over about 0.6 seconds, treat the room before you spend a dollar on mics.
- Under six seats, a certified all-in-one bar is usually both the correct answer and the cheapest one.
The Three Conference Room Microphone Types, and What Each One Solves
Every conference room microphone falls into one of three buckets: it sits on the table, it lives in the ceiling, or it runs on a battery. The differences that matter aren’t sound quality on a spec sheet. They’re distance to mouth, who owns the ceiling, and how often the furniture moves.
Distance is the one that decides everything else. Double the distance from a talker to a mic and you roughly quarter the direct sound energy reaching it, while the reflected sound from glass and drywall stays about the same. That ratio is what the far end hears as “hollow” or “in a bathroom.” Table mics win it by sitting 18 to 30 inches from a mouth. Ceiling arrays fight it with beamforming and DSP.
If you’re still shaping the wider room and not just the audio, our guide to video conferencing equipment covers how mics, cameras and displays get sized together instead of one at a time.
Everything below assumes a room already committed to a platform. A Zoom Room, a Microsoft Teams Room and a Google Meet room all care about mic certification, but none of them change the physics.
Table Microphones: The Best Coverage Per Dollar
Table mics are the workhorse. They’re also the option most people talk themselves out of for looks, then regret.
Two families exist. Passive-style pods that chain back to a video bar or codec, and networked table arrays that sit on the AV network and feed a DSP.
On the pod side, Logitech’s published specs for the Rally Mic Pod give a 15 foot diameter pickup range from four omnidirectional capsules forming eight acoustic beams, with up to seven pods daisy-chained on a single connection back to the table hub. Logitech’s accessories datasheet lists that 15 ft pickup range and the seven-pod daisy chain limit. A Rally Bar takes up to three pods; a Rally Bar Mini takes two.
On the networked side, a table array like the Shure MXA310 gives you four independently steerable pickup lobes plus a toroid pattern that captures at table level while rejecting sound from directly overhead. Shure describes the toroid pattern specifically as rejecting overhead HVAC and fan noise. That single feature is worth more in NYC than most people expect, because our supply diffusers are almost always directly above the table.
Street pricing sits roughly at $350 to $500 per pod and $1,100 to $1,900 per networked table array in 2026, before DSP and labour.
Where Table Mics Go Wrong
Three failure modes, in the order we see them.
The table has no cable path. Somebody specs pods for a solid-surface conference table with no grommet and no under-table raceway. Retrofitting a grommet into an installed stone or veneer top is a millwork job, not an AV job, and it adds days. Sort the table cabling at the same time as the structured cabling for AV, not after the furniture lands.
The wrong finish gets ordered for a plenum ceiling run. Logitech lists the white Rally Mic Pod as plenum rated while the graphite version isn’t. Colour changing the code status of a product surprises people every single time.
Nobody counted seats against pickup. A 15 foot pickup circle sounds enormous until you draw it on a 16 foot table with people at both ends. Two pods on a long table beats one pod plus optimism.
Ceiling Microphone Arrays: Clean Tables, Harder Installs
A ceiling array is a beamforming microphone that hangs above the seating area and steers pickup at whoever is talking. Tables stay empty. Furniture moves without a service call. Executives stop resting elbows on a mic.
Coverage is the number to design around. Shure states the MXA920 automatically covers up to a 30 by 30 foot area out of the box with minimal setup, which you can read on Shure’s own product announcement for the array. The limits underneath that headline matter more: Shure’s user guide sets a maximum talker-to-microphone distance of 16 feet and a maximum mounting height of 12 feet, and notes those figures still depend on the room’s construction and materials.
Sennheiser’s TeamConnect Ceiling 2 is the other array we see specified constantly. Sennheiser’s own application note recommends mounting the TCC 2 at 10 feet to get a 5 metre coverage radius and roughly 540 to 650 square feet of coverage. Its spec sheet lists PoE IEEE 802.3af Class 3 power at a maximum 8.8 W, plus UL 2043 testing. That UL 2043 line is the one your MEP engineer will ask about, because it’s what allows the unit in an air-handling plenum.
A pattern we see on almost every glass-walled corner office: the array performs beautifully in the mock-up room and mediocre in the real one, because the mock-up had carpet and the real room has polished concrete and two glass walls. Beamforming rejects off-axis sound. It cannot reject a reflection that arrives from the same direction as the talker.
What a Ceiling Array Really Costs in Manhattan
Hardware for a single premium array runs about $4,000 to $6,500, and a DSP to sit behind it adds roughly $1,200 to $4,000 depending on whether you’re on a Shure IntelliMix processor, a QSC Q-SYS core, or a Biamp platform.
Labour is where NYC diverges from the rest of the country. Realistic install ranges for one array in a finished Manhattan office land around $2,500 to $6,000, and the variables that move it are predictable:
- Ceiling type. Dropping into a 2 ft tile grid is a morning. Cutting a hard-lid gypsum ceiling means patching, priming and painting, plus a second trade.
- Access windows. On Manhattan build-outs the freight elevator window usually decides the schedule, not the equipment. A 7am to 11am loading dock slot turns a one-day job into two.
- Union labour and COI requirements. Building-mandated union electricians for the conduit and a certificate of insurance naming the landlord, managing agent and building are standard above a certain Class A threshold.
- After-hours premiums. Occupied floors mean evening or weekend work at a higher rate.
If echo is already the complaint in an existing room, our meeting room sound calibration work often resolves it without new hardware at all, and it’s the cheaper first call.
Wireless Conference Microphones: Flexibility With a Charging Habit
Wireless conference systems exist for rooms where cable simply isn’t allowed or isn’t practical. Landmarked buildings. Rooms with operable walls. Board tables that reconfigure for training on Thursdays.
Shure’s MXCW640 wireless conference unit packs a gooseneck mic input, a loudspeaker, a 4.3 inch touchscreen and an 11-hour rechargeable battery into one device that needs no table drilling. Published specs give up to 150 feet of range from the access point, operation on 2.4 GHz and 5 GHz, up to 125 units per access point and a maximum of 8 active microphones at once. Shure also notes AES-128 encryption and a networked charging station that takes ten batteries to full in four hours.
Boundary-style wireless is the lighter option. Shure’s MXW6X wireless boundary transmitter is rated for up to 17 hours on its rechargeable battery, operating in the 1.9 GHz DECT band that stays clear of your corporate Wi-Fi entirely.
Two honest warnings. Per-seat cost is high, generally $900 to $1,500 per unit plus $1,500 to $2,500 for the access point, so a 16-seat wireless board table gets expensive fast. And a wireless system is the only mic type with a daily operational chore attached. If no one owns docking the units at 6pm, the system will fail during a board meeting inside six months. Every time.
Wireless also earns its keep in divisible room AV systems, where seating geometry changes with the wall position and fixed table mics would sit in the wrong place half the year.
How to Choose a Conference Room Microphone by Room Size
Room size and seat count get you 80 percent of the way to the right answer. Use this as the starting matrix, then adjust for ceiling height and finishes.
| Room | Seats | Best-fit mic type | Realistic hardware range | Main watch-out |
|---|---|---|---|---|
| Huddle | 2 to 6 | Built-in bar mics, no add-on | $900 to $4,500 (whole bar) | Don’t over-buy. Bar mics are genuinely enough here. |
| Standard meeting | 6 to 10 | One table array or two pods | $700 to $2,200 | Table cable path and grommet location |
| Boardroom | 10 to 20 | Ceiling array, or two to three table arrays | $5,000 to $12,000 | Ceiling type, DSP tuning, glass reflections |
| Multipurpose / divisible | 16 to 40 | Ceiling arrays plus wireless for overflow | $12,000 to $30,000 | Mic gating across the wall position |
| Town hall / flexible | 40+ | Wireless units plus ceiling coverage | $25,000+ | Battery logistics and RF coordination |
For a 10 to 20 seat executive room, most of the decision comes down to whether the table can be cabled and whether the client will tolerate objects on the surface. Both answers usually arrive from the design side rather than AV, which is why we prefer to be in the room with the AV design consultants before millwork is released.
Small rooms are where the honest advice saves real money. A certified all-in-one bar with built-in beamforming covers a four to six person space properly, and adding a separate conference room microphone to a huddle space is one of the more common ways to spend $2,000 for no measurable improvement. Our huddle room solutions page covers where that line actually sits.
Five Mistakes That Make People Buy Twice
1. Buying mics to fix a network problem. If audio drops for 400 milliseconds and comes back, that’s packet loss or jitter, not the microphone. Check switch QoS and PoE budget first. Our notes on PoE switch planning walk through the settings worth verifying.
2. Mounting the array over the table instead of over the people. Beams aim at mouths, not furniture. On a long room the array belongs centred over the seated positions, which is often 12 to 18 inches off the table centreline.
3. Ignoring the HVAC diffuser. A supply diffuser within three feet of a ceiling array raises the noise floor enough to force the gate open constantly. Move the mic, or move the diffuser during the fit-out while the ceiling is still open.
4. Skipping the DSP. A ceiling array without proper AEC, gating and gain structure will underperform a $400 pod. The processor is not the optional part.
5. Counting seats but not sightlines. Executive rooms with credenza seating along the wall have talkers 8 to 10 feet behind the table edge, outside most table mic patterns entirely. Our mic placement by seat count breakdown covers the 6 to 12 person geometry in detail.
Treat the Room Before You Upgrade the Mic
Here’s the part that costs integrators sales and saves clients money.
Reverberation time is the gate. If RT60 in an empty room measures over roughly 0.6 seconds, no microphone on the market will make the far end sound good. You’ll buy a $6,000 array and get a marginally clearer version of the same echo. Treat first: acoustic panels behind the display wall, a proper carpet or acoustic underlay, and treatment on at least one of two parallel hard surfaces.
Background noise is the second gate. Design targets for conference rooms generally sit in the NC-25 to NC-30 range, and that’s a range rather than a hard number. Above it, gates chatter and automixers hunt.
AVIXA publishes a performance standard for this, ANSI/AVIXA A102.01 on audio coverage uniformity in listener areas, which classifies how consistently a sound system covers a defined listener area. It’s written for reproduction rather than capture, but the underlying idea holds: consistency across seats is the measurable goal, not peak performance at one chair.
After enough ceiling-mic installs you learn to walk in with a clap test and a phone SPL app before you write a quote. Two claps in a glass-walled room tells you more about the eventual outcome than any spec sheet. We’ve documented what that fix looks like in practice in our write-up on reducing echo in glass rooms, and the trade-off between panels and hardware in our piece on treatment versus mic budget.
Video Conferencing NY is a commercial AV and video conferencing integrator based in Manhattan, which means most of the rooms we assess are glass-heavy, ceiling-constrained and occupied while we work.
Your 10-Minute Self-Audit
Run this before you request a single quote. Bring a tape measure and your phone.
- Measure the longest talker-to-mic distance in the room. Over 16 feet means one ceiling array won’t do it.
- Measure ceiling height. Over 12 feet and a flush ceiling array is out of spec; pendant mount or go to table mics.
- Clap once, hard, in the empty room. If you hear a distinct ring rather than a dead thud, book treatment.
- Check what’s directly above the table. Diffuser, projector, exposed duct.
- Look under the table for an existing grommet or raceway. Note whether the top is stone, veneer or laminate.
- Count credenza and wall seating separately from table seating.
- Confirm ceiling type: tile grid, hard lid, exposed deck, or plenum return.
- Check your switch: available PoE budget, and whether the AV VLAN has QoS configured.
- Note building access rules, freight hours and COI requirements.
Nine answers. That’s enough for any integrator to quote accurately instead of padding for unknowns, and padding for unknowns is where 15 to 20 percent of a bad AV number comes from.
Where to Start This Week
Do the self-audit above, then decide one thing: can the table be cabled, or not. That single answer eliminates roughly half the conference room microphone options in front of you and turns a vague shopping exercise into a short list of two or three products.
If you’d rather not guess, we’ll run a room assessment on-site, measure reverberation and talker distances, and give you a written scope that specifies the mic count, the DSP and the labour separately so you can see what you’re actually paying for. Book a room assessment and we’ll tell you honestly if the room needs treatment before it needs hardware. Existing rooms welcome; a fair number of our assessments end with “keep the mics, fix the ceiling.”
For board-level rooms specifically, our boardroom AV solutions page covers how mic selection ties into the rest of the executive room build.
Frequently Asked Questions
What type of microphone is best for a conference room?
It depends on distance and table access.:
For rooms up to about six people, the built-in beamforming mics in a certified video bar are enough. For 6 to 20 people with a cabled table, networked table arrays give the best pickup per dollar. And for rooms where the table must stay clear or the furniture moves, a ceiling array is the right call despite costing three to five times more installed.
How many microphones does a 12-person conference room need?
Usually one ceiling array or two table arrays. A single premium ceiling array covers roughly 30 by 30 feet with a 16 foot maximum talker distance, which handles a typical 12-seat room from one unit. With table pods rated around a 15 foot pickup diameter, two units spaced along the table is the safe configuration for a 14 to 18 foot table.
Are ceiling microphones better than table microphones?
Not inherently. Ceiling arrays sound better in a well-treated room and worse in a reflective one, because they sit further from the talker. Table mics are closer to the mouth and more forgiving of poor acoustics. Ceiling arrays win on aesthetics, furniture flexibility and durability; table mics win on cost, ease of retrofit and raw signal-to-noise.
Do conference room microphones need their own network?
Networked mics using Dante or AES67 should sit on a dedicated AV VLAN with QoS configured and enough PoE headroom on the switch. Analogue and USB mics don’t. Mixing uncontrolled Dante traffic onto a general corporate VLAN is one of the most common causes of intermittent audio dropouts in otherwise well-built rooms.
How much does a conference room microphone system cost in NYC?
Budget roughly $700 to $2,200 in hardware for a standard 6 to 10 person room, and $5,000 to $12,000 for a boardroom ceiling array with DSP. Installation in a finished Manhattan office typically adds $2,500 to $6,000 per room, driven by ceiling type, union labour requirements, COI paperwork and whether the work happens after hours.
Send us the room dimensions and a photo of the ceiling and we’ll tell you which of the three options actually fits.
About Video Conferencing NY
Video Conferencing NY is a commercial AV and video conferencing integrator based at 575 8th Avenue, Suite 1704, in Manhattan, serving New York City and the surrounding metro. The team designs, installs, wires, calibrates and supports Zoom Rooms, Microsoft Teams Rooms, Google Meet and Webex spaces, from huddle rooms and boardrooms through to divisible rooms and town hall spaces.